
Introduction to Mini Cheesecakes
Mini cheesecakes are individual-sized portions of everyone’s favorite creamy dessert, baked in muffin tins or small ramekins. These adorable treats combine all the rich, velvety texture of traditional cheesecake with the convenience of perfectly portioned servings that are ready to grab and enjoy.
Why are mini cheesecakes so popular?
Mini cheesecakes have become a favorite among home bakers and dessert lovers for several compelling reasons. They bake much faster than full-size cheesecakes, typically requiring only 15-20 minutes instead of an hour or more. This means you can satisfy your cheesecake craving without the long wait. They’re also incredibly versatile for entertaining since each guest gets their own perfect portion, eliminating the need for slicing and serving. The individual format makes them ideal for parties, potlucks, and special events where variety is appreciated.
From a practical standpoint, mini cheesecakes are more forgiving than their full-size counterparts. The smaller surface area means less risk of major cracks, and if one doesn’t turn out perfectly, you still have eleven more in the batch. They’re easier to store, freeze beautifully for make-ahead occasions, and allow you to experiment with multiple flavors in a single baking session. Whether you’re a beginner baker or an experienced dessert maker, mini cheesecakes offer the perfect balance of impressive presentation and manageable preparation.
What You Need to Make Mini Cheesecakes
Basic Tools and Equipment
To successfully create beautiful mini cheesecakes, you’ll need a few essential items:
- Muffin tin (standard 12-cup size works best)
- Paper or foil cupcake liners (paper liners make removal easier)
- Electric mixer (hand mixer or stand mixer)
- Mixing bowls (at least two medium-sized bowls)
- Measuring cups and spoons
- Spatula (for scraping down bowl sides)
- Cooling rack
- Optional: Piping bag (for decorating)
Crust Options to Explore
The crust is your flavor foundation, and you have wonderful options beyond basic graham crackers:
Graham Cracker Crust – The classic choice that provides a slightly sweet, honey-flavored base. Mix 1 cup graham cracker crumbs with 3 tablespoons melted butter and 1 tablespoon sugar.
Oreo Crust – Perfect for chocolate lovers, offering a rich, cookies-and-cream foundation. Use 1 cup crushed Oreos (with filling) and 2 tablespoons melted butter.
Biscoff Cookie Crust – Adds a warm, caramelized spice flavor that pairs beautifully with fruit or caramel toppings. Combine 1 cup Biscoff cookie crumbs with 2-3 tablespoons melted butter.
Nilla Wafer Crust – Light and vanilla-forward, ideal for delicate fruit flavors. Mix 1 cup crushed Nilla wafers with 3 tablespoons melted butter.
Pretzel Crust – For a sweet-and-salty twist, use 1 cup crushed pretzels, 2 tablespoons melted butter, and 2 tablespoons sugar.
Essential Cheesecake Filling Ingredients
The filling is where the magic happens. Here’s what you need for a basic batch:
- 16 oz cream cheese (two 8-oz packages, softened to room temperature)
- 1/2 cup granulated sugar
- 2 large eggs (also at room temperature)
- 1 teaspoon vanilla extract
- 1/4 cup sour cream (adds extra creaminess and tang)
- Pinch of salt (enhances overall flavor)
Pro Baking Tips for Perfect Results
Temperature matters: Always use room temperature ingredients. Cold cream cheese creates lumps, and cold eggs can cause the batter to seize. Leave ingredients out for 30-60 minutes before baking.
Don’t overmix: Beat the cream cheese and sugar until just smooth, then add eggs one at a time, mixing on low speed. Overmixing incorporates too much air, which leads to cracks and sinking.
Bake low and slow: Use 325°F rather than higher temperatures. This gentle heat prevents the tops from puffing up and then collapsing.
Watch for doneness: Mini cheesecakes are done when the edges are set but the centers still jiggle slightly. They’ll continue to set as they cool.
Cool gradually: Let cheesecakes cool in the turned-off oven with the door cracked for 10 minutes, then move to a cooling rack. Sudden temperature changes cause cracks.
Storage and Freezing Tips
Refrigerator storage: Cover mini cheesecakes tightly with plastic wrap or store in an airtight container. They’ll stay fresh for 5-7 days in the refrigerator.
Freezing instructions: Mini cheesecakes freeze exceptionally well for up to 3 months. Place them on a baking sheet and freeze until solid (about 2 hours), then transfer to a freezer-safe container with parchment paper between layers. Thaw in the refrigerator overnight before serving. Add toppings after thawing for best results.
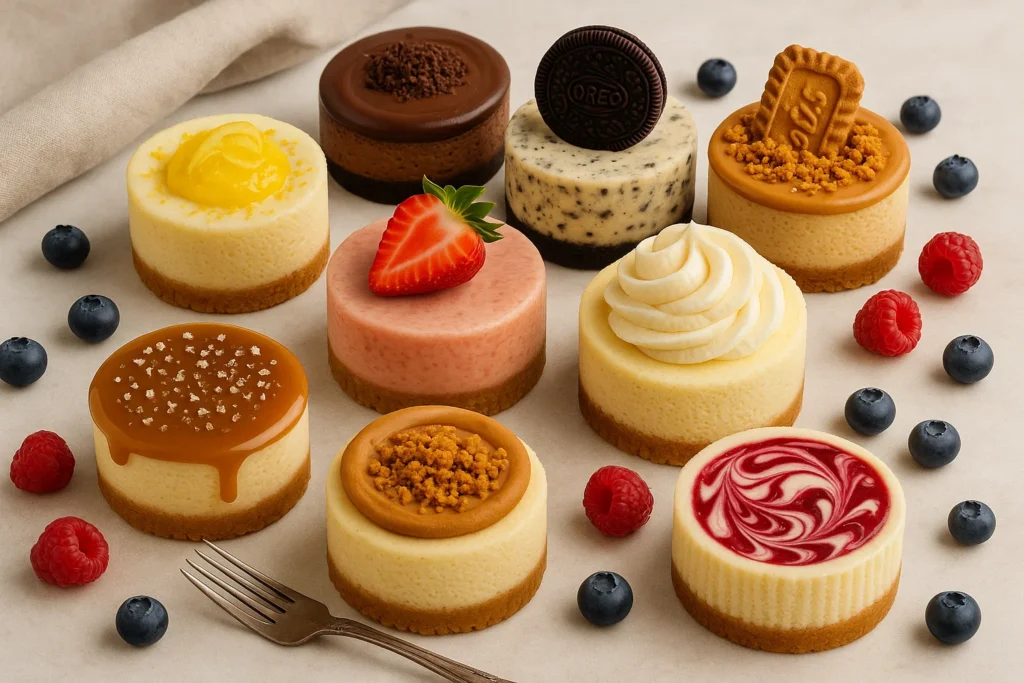
Best Mini Cheesecake Flavors
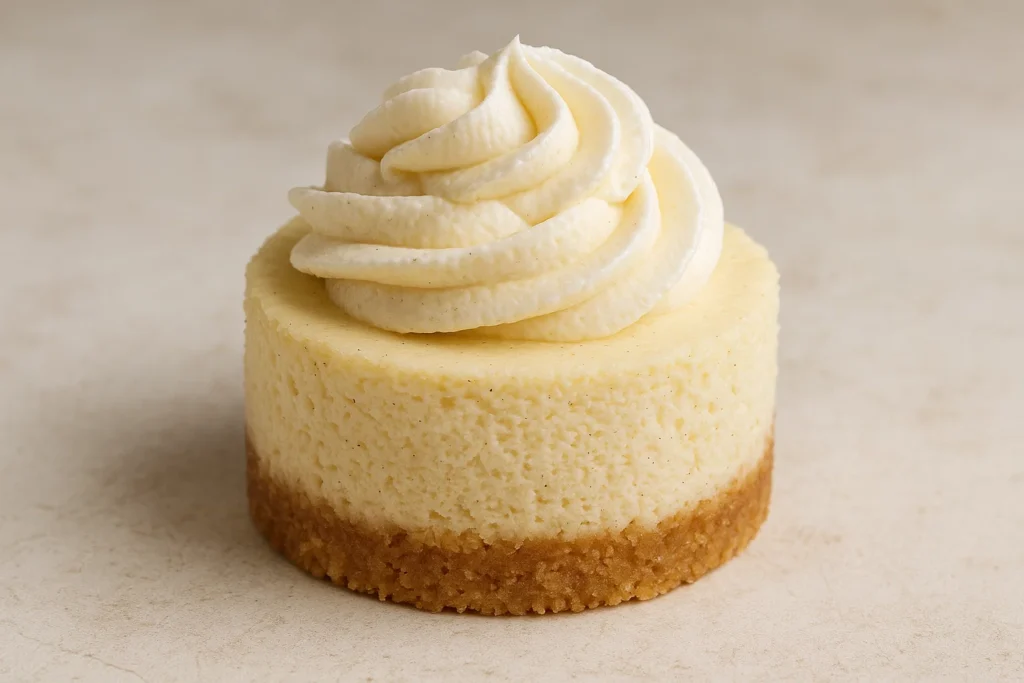
Classic Vanilla
Classic vanilla mini cheesecakes are the timeless foundation that every baker should master. This pure, elegant flavor showcases the rich, creamy texture of cheesecake without competing flavors, making it the perfect canvas for any topping. The subtle sweetness and velvety smooth consistency make vanilla mini cheesecakes universally loved and ideal for any occasion.
Key ingredients: Cream cheese, sugar, eggs, vanilla extract (use pure extract for best flavor), sour cream, graham cracker crust.
Baking tips: Use high-quality pure vanilla extract or vanilla bean paste for deeper flavor. Scrape the filling bowl thoroughly to ensure even vanilla distribution. These cheesecakes pair beautifully with fresh berries, chocolate drizzle, or caramel sauce. The plain vanilla base makes them incredibly versatile for last-minute topping decisions.
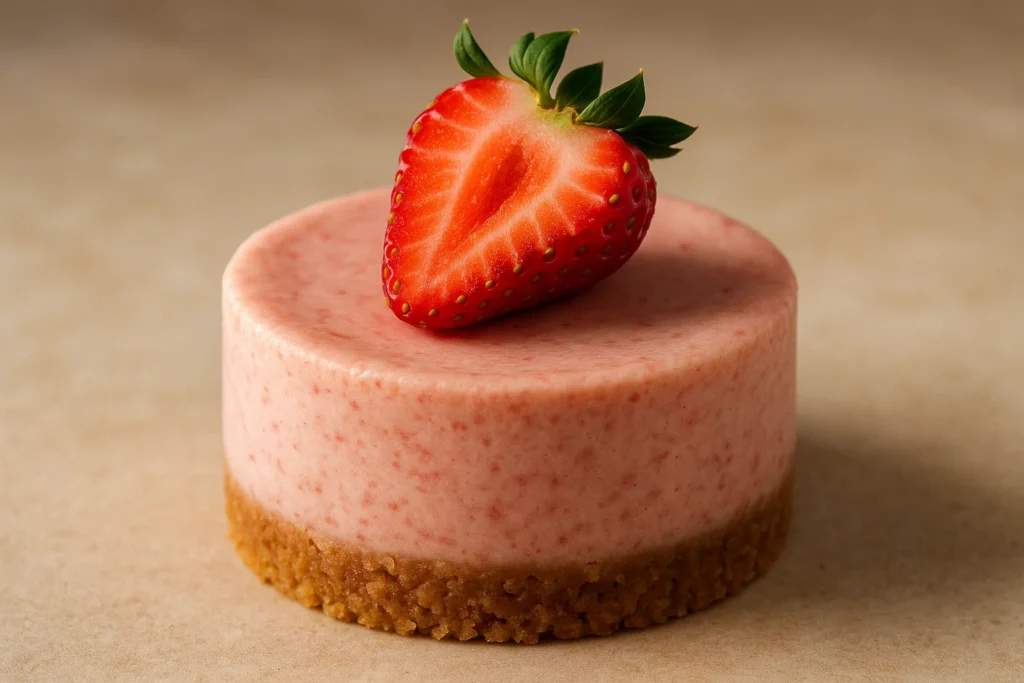
Strawberry
Strawberry mini cheesecakes bring the sweet, bright flavor of fresh berries to the creamy cheesecake base. This crowd-pleasing combination works wonderfully for spring and summer gatherings, baby showers, and Valentine’s Day celebrations. You can incorporate strawberry flavor through fresh puree in the batter, a swirl on top, or a fresh strawberry compote topping.
Key ingredients: Cream cheese base, fresh or frozen strawberries, strawberry puree or jam, graham cracker crust, optional strawberry extract for enhanced flavor.
Baking tips: If adding strawberry puree to the batter, reduce other liquids slightly to maintain proper consistency. For a swirled effect, drop small spoonfuls of strawberry puree on top and gently swirl with a toothpick before baking. Fresh strawberry toppings should be added after baking and cooling to prevent sogginess. Roasting strawberries before pureeing intensifies their flavor.
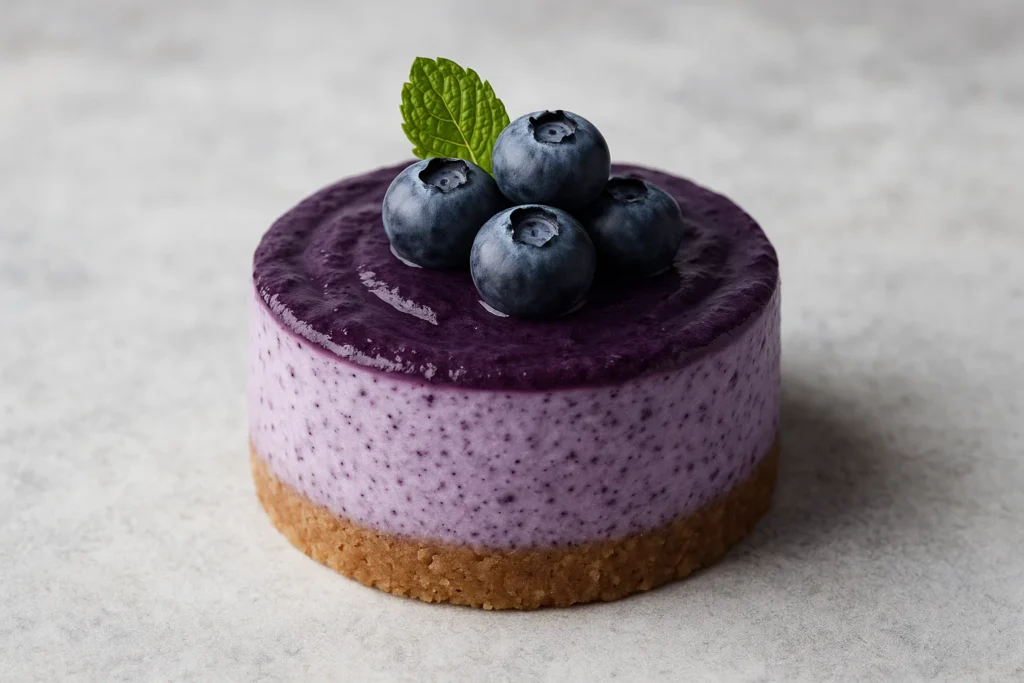
Blueberry
Blueberry mini cheesecakes offer a delightful balance of tangy fruit and sweet cream. The deep purple-blue color makes these visually stunning, while the slight tartness of blueberries complements the rich cheesecake perfectly. These are excellent for patriotic holidays, summer picnics, or any time you want an antioxidant-rich dessert.
Key ingredients: Cream cheese base, fresh or frozen blueberries, lemon zest (enhances blueberry flavor), blueberry compote or pie filling, graham cracker or Nilla wafer crust.
Baking tips: Toss fresh blueberries in a teaspoon of flour before adding to prevent them from sinking. For blueberry swirl cheesecakes, cook down blueberries with sugar and lemon juice until jammy, then swirl into the batter. Frozen blueberries work well but release more liquid, so consider making a thickened compote topping instead of baking them in. Add a touch of lemon zest to the filling to brighten the blueberry flavor.
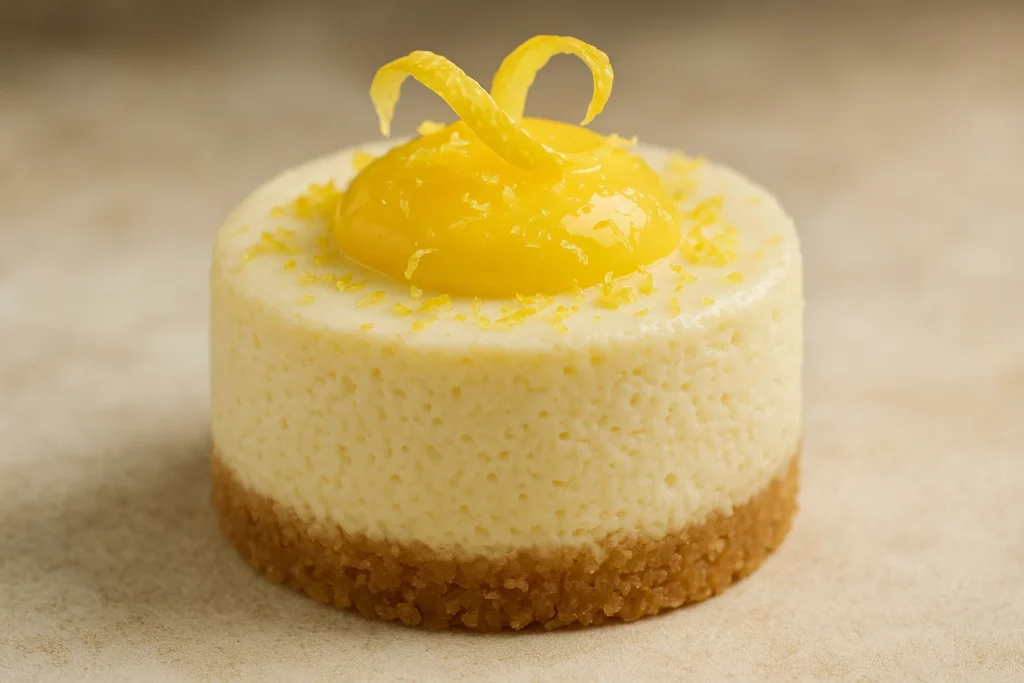
Lemon
Lemon mini cheesecakes are refreshingly tart and bright, perfect for cutting through the richness of cream cheese. These zesty treats are ideal for spring and summer events, afternoon tea parties, or any time you crave something citrusy and light. The combination of creamy and tangy makes these incredibly addictive.
Key ingredients: Cream cheese base, fresh lemon juice, lemon zest, graham cracker or shortbread crust, optional lemon curd for topping.
Baking tips: Use both lemon juice and zest for maximum flavor impact—the zest contains aromatic oils that intensify the lemon taste. Add 2-3 tablespoons of fresh lemon juice and 1 tablespoon of zest to the basic filling. Be careful not to add too much liquid, or the cheesecakes won’t set properly. For extra lemon punch, top cooled cheesecakes with homemade or store-bought lemon curd. A light dusting of powdered sugar makes these especially pretty.
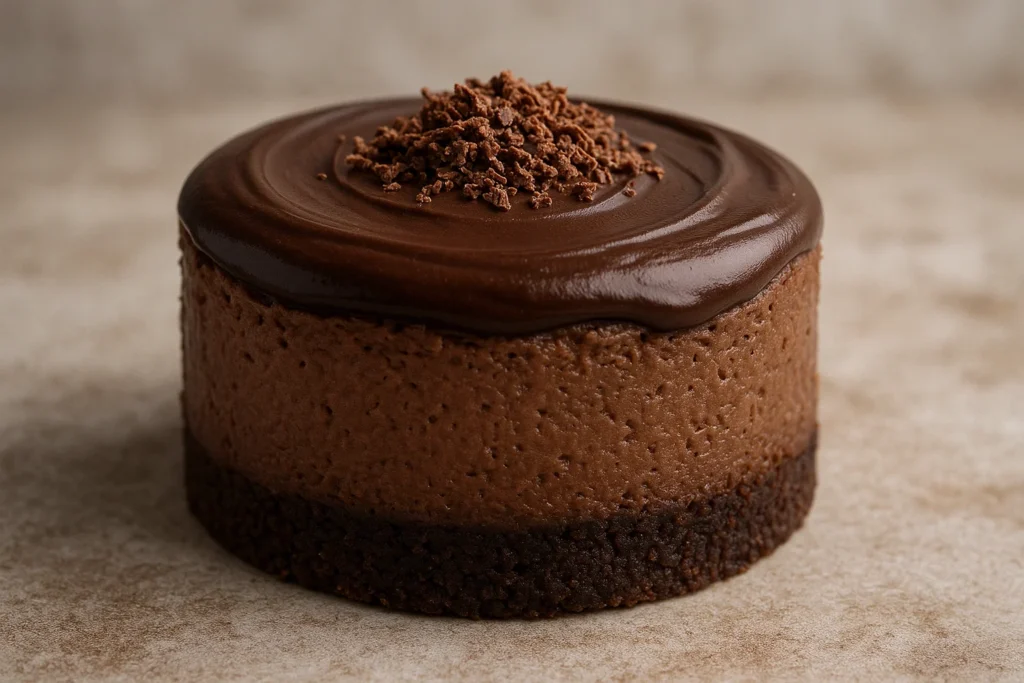
Chocolate
Chocolate mini cheesecakes satisfy the deepest chocolate cravings with their rich, decadent flavor. These dark, luxurious treats appeal to serious chocolate lovers and work beautifully for romantic occasions, dinner parties, or holiday celebrations. The combination of chocolate and cream cheese creates an irresistibly smooth, mousse-like texture.
Key ingredients: Cream cheese base, cocoa powder or melted chocolate (or both), Oreo or chocolate cookie crust, chocolate chips for topping, optional espresso powder to enhance chocolate flavor.
Baking tips: For the deepest chocolate flavor, use a combination of Dutch-process cocoa powder (3-4 tablespoons) and melted semi-sweet chocolate (4 oz). Let melted chocolate cool slightly before adding to prevent cooking the eggs. Adding 1/2 teaspoon of espresso powder intensifies the chocolate without adding coffee flavor. Use an Oreo crust for maximum chocolate impact. Top with chocolate ganache, chocolate shavings, or a dollop of whipped cream.
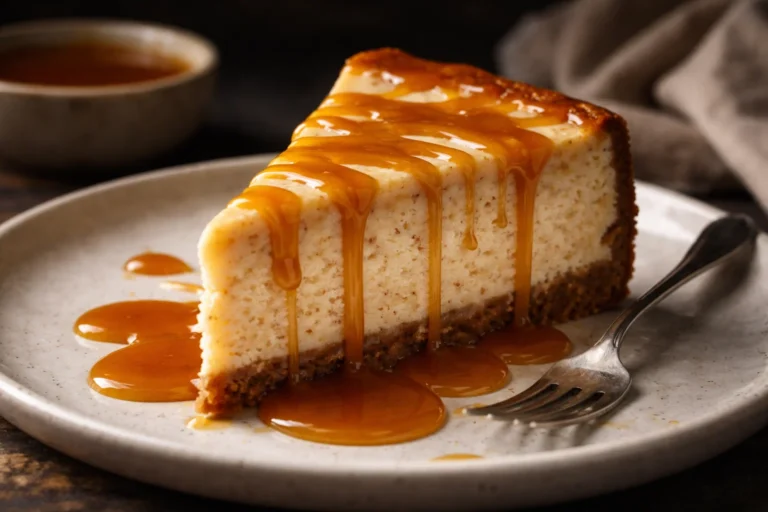
Salted Caramel
Salted caramel mini cheesecakes combine sweet, buttery caramel with a hint of sea salt for a sophisticated flavor profile. This trendy combination has become a modern classic, appealing to those who love the sweet-and-salty contrast. These elegant treats are perfect for fall gatherings, dinner parties, or whenever you want to impress.
Key ingredients: Cream cheese base, caramel sauce (homemade or quality store-bought), sea salt, graham cracker or Biscoff crust, additional caramel for drizzling.
Baking tips: Swirl caramel sauce into the cheesecake batter before baking for ribbons of flavor throughout, or reserve it for topping after cooling. If swirling, use a thick caramel that won’t sink. Sprinkle flaky sea salt on top just before serving for the best flavor and texture contrast. A Biscoff cookie crust adds an extra caramelized dimension. For an extra layer of flavor, add a thin layer of caramel between the crust and filling.

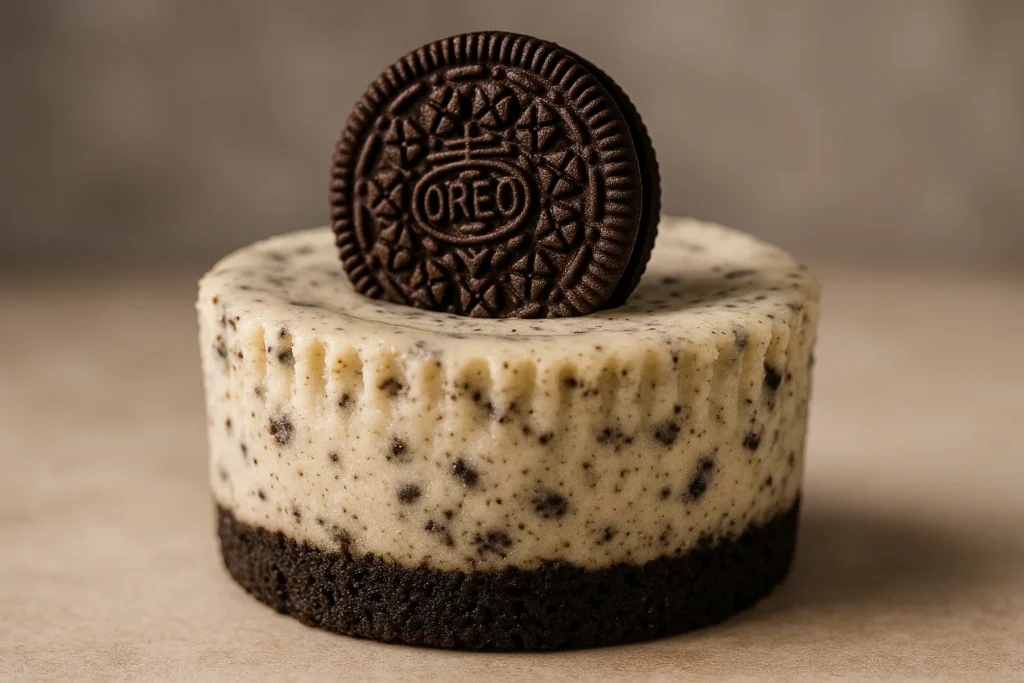
Oreo
Oreo mini cheesecakes are the ultimate cookies-and-cream experience, combining crushed Oreos in the crust, throughout the filling, and as a garnish on top. These black-and-white beauties are kid-friendly, nostalgic, and guaranteed crowd-pleasers. They’re perfect for birthday parties, casual get-togethers, or satisfying your inner child.
Key ingredients: Cream cheese base, crushed Oreo cookies, Oreo cookie crust, whole or half Oreos for decoration, optional white chocolate drizzle.
Baking tips: Create an Oreo crust using crushed cookies with filling intact. Fold chopped Oreos into the cheesecake batter just before pouring into liners—don’t overmix or they’ll turn gray. Press a half or whole Oreo into the top of each cheesecake before baking for a dramatic presentation. For extra impact, drizzle cooled cheesecakes with melted white chocolate. These also work beautifully with Golden Oreos for a lighter variation.
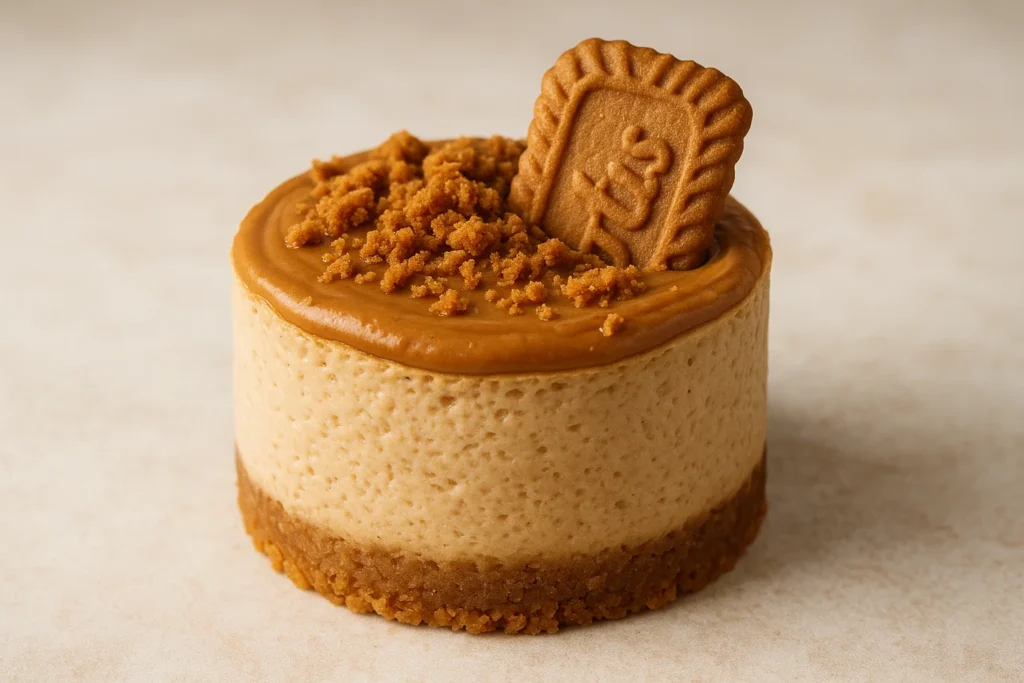
Biscoff
Biscoff mini cheesecakes capture the warm, caramelized spice flavor of Biscoff cookies and spread. These European-inspired treats offer a unique flavor that’s not quite cinnamon, not quite caramel, but absolutely delicious. They’re sophisticated enough for adult gatherings while still being approachable and comforting.
Key ingredients: Cream cheese base, Biscoff cookie spread, crushed Biscoff cookies for crust, additional Biscoff cookies for garnish, cinnamon.
Baking tips: Blend 1/3 cup of Biscoff cookie spread into the cheesecake batter for that signature caramelized flavor. Use a Biscoff cookie crust for maximum impact. Warm additional cookie spread slightly to make it pourable, then drizzle over cooled cheesecakes. Garnish with a whole Biscoff cookie pressed into the top or crumbled over whipped cream. A light sprinkle of cinnamon enhances the warm spice notes.
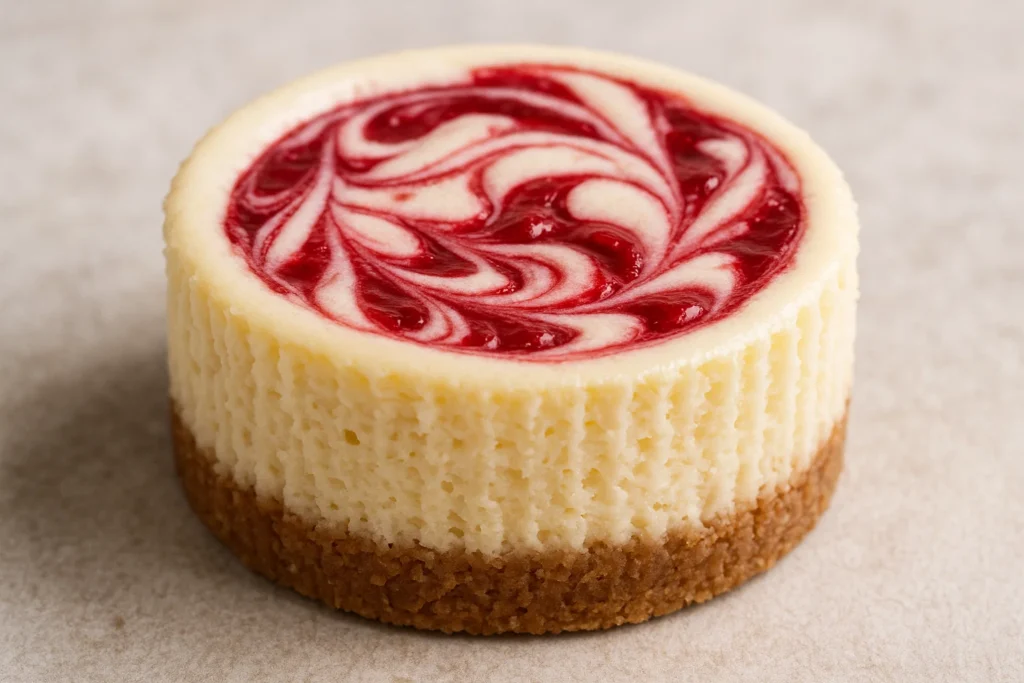
Raspberry Swirl
Raspberry swirl mini cheesecakes feature beautiful pink and white marble patterns with a bright, tart raspberry flavor. These elegant desserts are visually stunning and taste as good as they look. The tartness of raspberries provides a perfect counterpoint to the sweet, rich cheesecake, making them ideal for sophisticated occasions.
Key ingredients: Cream cheese base, fresh or frozen raspberries, raspberry jam or preserves, graham cracker crust, lemon juice to brighten raspberry flavor.
Baking tips: Make a raspberry sauce by cooking raspberries with sugar and lemon juice, then straining to remove seeds. Let the sauce cool before using. Drop small spoonfuls of raspberry sauce on top of the cheesecake batter, then use a toothpick or skewer to create swirl patterns. Don’t over-swirl or colors will muddy. For a smoother result, puree and strain raspberries before adding. Fresh raspberries make beautiful garnishes along with mint leaves.
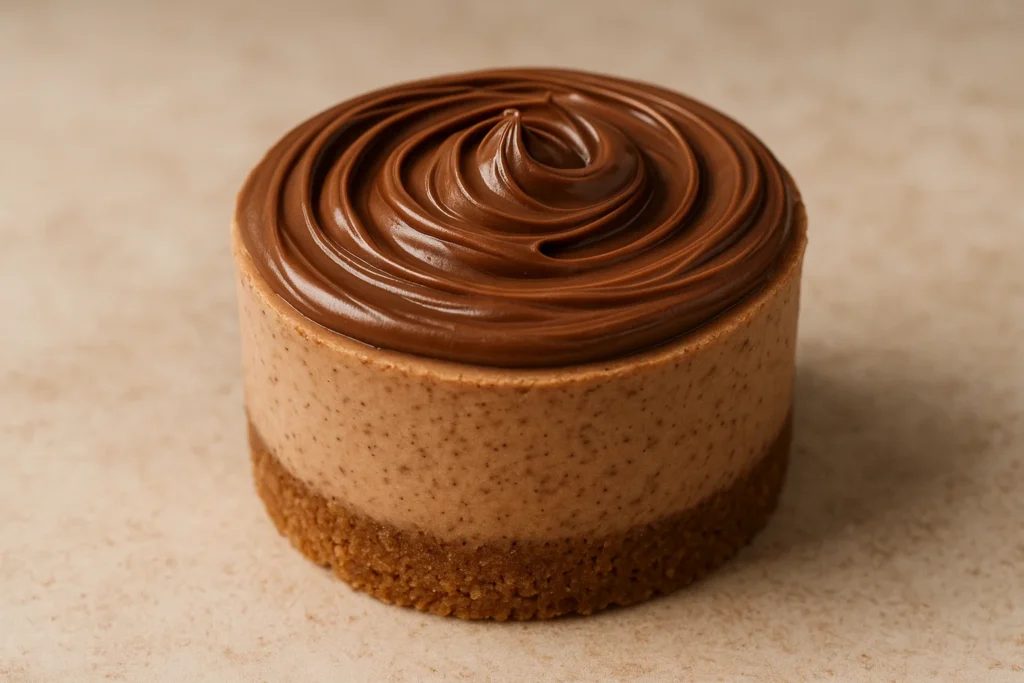
Nutella
Nutella mini cheesecakes deliver rich chocolate-hazelnut flavor in every bite. These indulgent treats appeal to Nutella lovers everywhere and offer a sophisticated twist on traditional chocolate cheesecake. The combination of chocolate, hazelnut, and cream cheese creates a luxurious dessert that feels both comforting and special.
Key ingredients: Cream cheese base, Nutella spread, Oreo or graham cracker crust, chopped hazelnuts for topping, optional hazelnut liqueur for adult versions.
Baking tips: Beat 1/2 cup of Nutella into the cream cheese mixture until fully incorporated. The Nutella adds both flavor and a beautiful color to the filling. Use an Oreo or chocolate cookie crust to complement the chocolate-hazelnut flavor. Top cooled cheesecakes with a dollop of Nutella slightly warmed for easier spreading, or create a ganache using Nutella thinned with a bit of cream. Garnish with chopped toasted hazelnuts for added crunch and visual appeal.
Flavor Summary & Difficulty Level
| Flavor | Prep Time | Difficulty Level | Ideal Occasions | Key Flavor Notes |
|---|---|---|---|---|
| Classic Vanilla | 15 minutes | Easy | Any occasion, elegant dinners, weddings | Pure, creamy, versatile |
| Strawberry | 20 minutes | Easy | Spring/summer events, showers, Valentine’s | Sweet, fruity, romantic |
| Blueberry | 20 minutes | Easy | Patriotic holidays, summer picnics | Tangy, antioxidant-rich |
| Lemon | 15 minutes | Easy | Spring teas, garden parties, brunch | Bright, tart, refreshing |
| Chocolate | 20 minutes | Easy-Medium | Date nights, holidays, celebrations | Rich, decadent, indulgent |
| Salted Caramel | 25 minutes | Medium | Fall gatherings, dinner parties | Sweet-salty, sophisticated |
| Oreo | 20 minutes | Easy | Birthday parties, casual events | Nostalgic, cookies-and-cream |
| Biscoff | 20 minutes | Easy-Medium | Coffee dates, adult gatherings | Caramelized, spiced, unique |
| Raspberry Swirl | 25 minutes | Medium | Bridal showers, elegant events | Tart, beautiful, refined |
| Nutella | 20 minutes | Easy-Medium | Dessert buffets, chocolate lovers | Chocolate-hazelnut, luxurious |
Note: All prep times exclude baking (15-18 minutes) and cooling time (minimum 2 hours). Difficulty ratings reflect both technique and ingredient accessibility.
Step-by-Step Guide: How to Make Any Mini Cheesecake
Step 1: Making the Perfect Crust
The crust is your foundation, so take time to get it right. Choose your cookie or cracker base and process it into fine crumbs using a food processor, or place them in a sealed plastic bag and crush with a rolling pin. You want consistent, sand-like crumbs without large chunks.
Mix the crumbs with melted butter until the mixture resembles wet sand and holds together when pressed. For a 12-count batch, you’ll typically need 1 cup of crumbs and 2-3 tablespoons of melted butter. Add sugar if your base isn’t sweet enough (1-2 tablespoons works well).
Line your muffin tin with paper or foil liners. Spoon about 1 tablespoon of the crust mixture into each liner, then press firmly with the back of a spoon or a small glass to create an even, compact layer. The more firmly you press, the better the crust will hold together.
Pre-bake the crusts at 325°F for 5 minutes. This step is optional but recommended—it helps the crust set and prevents sogginess. Let them cool while you prepare the filling.
Step 2: Preparing the Filling
Ensure your cream cheese is at room temperature—this is crucial for a smooth, lump-free filling. Cut the cream cheese into chunks and beat it on medium speed for 1-2 minutes until completely smooth and fluffy. Stop and scrape down the bowl sides frequently.
Add the sugar and beat for another minute until fully incorporated. The mixture should be light and creamy. Add any flavor extracts or flavorings at this stage (vanilla, lemon zest, cocoa powder, etc.) and beat until combined.
Add eggs one at a time, beating on low speed just until incorporated after each addition. Don’t overbeat once eggs are added—this incorporates too much air and causes cracking and sinking. Mix just until you no longer see streaks of egg.
Finally, add sour cream and mix briefly until just combined. The filling should be smooth, creamy, and pourable but not too thin. If adding mix-ins like chocolate chips or crushed cookies, fold them in gently by hand at the very end.
Step 3: Adding Flavors and Mix-ins
This is where you customize your mini cheesecakes. For liquid flavorings like vanilla extract, lemon juice, or liqueurs, add them directly to the filling during the creaming stage. Use 1-2 teaspoons of extracts or 2-3 tablespoons of juices for a standard batch.
For chocolate flavor, melt chocolate separately and let it cool to lukewarm before folding into the batter. Alternatively, sift cocoa powder with the sugar before adding to the cream cheese. For swirl effects using fruit purees, chocolate, or caramel, fill the liners with plain batter first, then drop small spoonfuls of your swirl ingredient on top. Use a toothpick to create marble patterns.
For chunky mix-ins like crushed cookies, nuts, or chocolate chips, fold them in gently after the filling is completely mixed. Don’t overmix or they’ll sink. Reserve some to sprinkle on top before baking for visual appeal.
Step 4: Baking and Cooling
Preheat your oven to 325°F. Fill each liner about 3/4 full with cheesecake batter—they’ll puff slightly during baking. Tap the muffin tin gently on the counter a few times to release air bubbles.
Bake for 15-18 minutes. Mini cheesecakes are done when the edges are set but the centers still jiggle slightly when you gently shake the pan. They should not be browned on top. Remember, they’ll continue to set as they cool, so slightly underbaking is better than overbaking.
Turn off the oven and crack the door open. Let the cheesecakes sit in the cooling oven for 10 minutes. This gradual temperature change helps prevent cracking. After 10 minutes, remove from the oven and let cool to room temperature on a cooling rack (about 30 minutes).
Once at room temperature, cover and refrigerate for at least 2 hours, but preferably overnight. Cheesecakes need this chilling time to fully set and develop their flavor. They’ll also be much easier to remove from the liners when properly chilled.
Step 5: Decoration Ideas
Once your mini cheesecakes are fully chilled, the fun of decorating begins. Fresh fruit makes a beautiful and delicious topping—try fanned strawberries, fresh blueberries, or raspberry clusters. Brush fruit with warmed apricot or apple jelly for a professional glazed look.
Whipped cream is classic and versatile. Pipe it on with a star tip for an elegant presentation, or simply dollop it on top. Stabilized whipped cream (made with cream cheese or gelatin) holds up better if you’re making these ahead.
Drizzles and sauces add flavor and visual interest. Warm chocolate ganache, caramel sauce, or fruit coulis in a squeeze bottle or ziplock bag with a corner snipped off, then drizzle in zigzag patterns. For a cleaner look, pool sauce on the plate beside the cheesecake instead of on top.
Garnishes add the final touch. Try chocolate shavings, cookie crumbs, chopped nuts, mint leaves, or edible flowers. A light dusting of cocoa powder or powdered sugar through a fine-mesh sieve creates an elegant finish. For special occasions, consider gold leaf, sparkler candles, or themed cake toppers.
Frequently Asked Questions
Why do mini cheesecakes crack?
Cracks in mini cheesecakes typically happen due to sudden temperature changes or overmixing. When you overbeat the batter, especially after adding eggs, you incorporate too much air. This air expands during baking, causing the cheesecakes to rise too quickly and then collapse and crack as they cool. Baking at too high a temperature or opening the oven door repeatedly can also cause rapid temperature fluctuations that lead to cracking.
To prevent cracks, mix on low speed once eggs are added, bake at 325°F or lower, and let cheesecakes cool gradually in the turned-off oven with the door cracked. Using room temperature ingredients and avoiding overbaking also helps significantly.
How do I prevent mini cheesecakes from sinking?
Sinking happens when too much air is incorporated during mixing and then escapes during cooling. It can also occur if the cheesecakes are underbaked and don’t have enough structure to support themselves. To prevent sinking, avoid overbeating the batter—mix just until ingredients are combined. Make sure your oven temperature is accurate using an oven thermometer, as an oven that runs too hot causes rapid rising and sinking.
Bake until the edges are set and the centers still have a slight jiggle—they should not look wet or liquid. Let them cool gradually in the oven, then at room temperature, before refrigerating. This slow cooling process allows the structure to set properly without collapsing.
Can I make mini cheesecakes without a muffin tin?
Absolutely! You have several options if you don’t have a muffin tin. Silicone muffin cups work wonderfully and can be placed directly on a baking sheet—they’re flexible and make removal incredibly easy. Small ramekins or oven-safe cups (4-6 oz size) create individual servings with a more upscale presentation. Mason jar lids or small tart pans with removable bottoms also work well.
If using individual containers without liners, grease them lightly with butter or non-stick spray before adding the crust. Keep in mind that baking times may vary slightly depending on the size and material of your containers. Glass and ceramic take longer than metal, so watch for doneness cues rather than relying strictly on time.
How long do mini cheesecakes last?
Properly stored mini cheesecakes will stay fresh in the refrigerator for 5-7 days. Store them in an airtight container or cover tightly with plastic wrap to prevent them from absorbing refrigerator odors and to keep them from drying out. If your cheesecakes have fresh fruit toppings, they’re best consumed within 2-3 days as the fruit can become watery.
For longer storage, mini cheesecakes freeze beautifully for up to 3 months. Freeze them without toppings on a baking sheet until solid, then transfer to a freezer-safe container with parchment paper between layers. Thaw in the refrigerator overnight before serving, and add fresh toppings after thawing. The texture remains remarkably close to freshly made when properly frozen and thawed.
Conclusion
Mini cheesecakes offer the perfect combination of impressive presentation, delicious flavor, and manageable baking. Whether you’re drawn to classic vanilla simplicity, adventurous flavor combinations, or somewhere in between, these individual treats give you the freedom to experiment without the commitment of a full-size cake.
Don’t be afraid to mix and match elements from different flavors—try a Biscoff crust with chocolate filling, or a lemon cheesecake with blueberry topping. The beauty of mini cheesecakes is that you can make several flavors in one batch, giving everyone their perfect slice.
Start with the classic vanilla to master your technique, then branch out to more complex flavors as you gain confidence. Remember that even if they crack a little or sink slightly, they’ll still taste absolutely delicious. Happy baking, and enjoy every creamy, dreamy bite of your mini cheesecake creations!